最近因某些原因重装了Win10, 虚拟机也需要重装, 记录一下过程, 供以后查阅, 以免走更多弯路
一些常用命令
scp:- 比如把自己windows上的某个文件test.py上传到某台linux上, 则在windows上用git bash到达这个文件所在的目录然后输入命令
scp test.py hlh@192.168.80.8:/home/test_dir - 下载则把命令顺序反过来:
- 比如把自己windows上的某个文件test.py上传到某台linux上, 则在windows上用git bash到达这个文件所在的目录然后输入命令
make && make install之前用configure的时候记得用--prefix指定安装目录, 这样就只会安装到这个目录不会分散到各处, 卸载的时候就很方便, 比如编译安装python3.8的时候就会有类似如这样的命令:1
2
3$ ./configure --prefix=/usr/local/python3 --enable-optimizations
$ make
$ make install
需准备的工具和材料
- 虚拟机软件
- Ubuntu : 我用的是16.04版本的ubuntu的server版本(不是desktop桌面版)
- 建议给虚拟机分配20G硬盘空间
- 建议给虚拟机分配4G内存
设置root密码与sudo免密码权限
设置root密码: sudo passwd root
打开sudo免密码权限, 则sudo vi /etc/sudoers, 然后编辑%sudo ALL=(ALL) NOPASSWD:ALL
设置ssh的公钥登陆
在自己的home目录下
mkdir .sshchmod 700 .sshcd .sshvi authorized_keys然后编辑加入自己的公钥- `chmod 644 authorized_keys
SSH 证书登陆配置:
sudo vi /etc/ssh/sshd_config- 取消注释 :
#AuthorizedKeysFile .ssh/authorized_keys - 修改yes->no :
PasswordAuthentication no sudo service ssh restart
网络设置
直接桥接网卡即可, 然后给虚拟服务器设置静态IP, 操作如下:
- 先
ifconfig查看自己当前的ip, 使用vim编辑
/etc/network/interfaces, 然后将自己的当前ip填入, 比如是192.168.1.14, 则改为1
2
3
4
5
6
7
8
9
10
11
12
13
14
15
16
17# This file describes the network interfaces available on your system
# and how to activate them. For more information, see interfaces(5).
source /etc/network/interfaces.d/*
# The loopback network interface
auto lo
iface lo inet loopback
# The primary network interface
auto enp0s3
# iface enp0s3 inet dhcp
iface enp0s3 inet static
address 192.168.1.14
netmask 255.255.255.0
gateway 192.168.1.1
dns-nameservers 114.114.114.114 8.8.8.8重启网络(
service networking restart)或者系统ping baidu.com看看是否通了设置全局代理, 比如宿主机的vray的http代理为
http://127.0.0.1:10809, 而宿主机的ip为192.168.82.177, 则在vbox里的ubuntu的~/.bashrc最后加上1
2
3# export ALL_PROXY="http://192.168.82.177:10809"
alias setproxy="export ALL_PROXY=http://192.168.82.177:10809"
alias unsetproxy="unset ALL_PROXY"然后
source ~/.bashrc即可
说明:
- auto 后为 ifconfig 查出来的虚拟机网卡
- iface enp0s3 inet 后的 dhcp 改为 static
- address 虚拟机 ip 设置为当前自动分配的 ip 即可,配置好后面重启就一直保持这个 ip
- netmask 子网掩码与宿主机一致
- gateway 默认网关与宿主机一致
- dns-nameserver DNS 服务器
更换源
见原网站
Ubuntu 的软件源配置文件是 /etc/apt/sources.list。将系统自带的该文件做个备份,将该文件替换为下面内容,即可使用 TUNA 的软件源镜像。替换之后记得 sudo apt-get update
# 默认注释了源码镜像以提高 apt update 速度,如有需要可自行取消注释
deb https://mirrors.tuna.tsinghua.edu.cn/ubuntu/ xenial main restricted universe multiverse
# deb-src https://mirrors.tuna.tsinghua.edu.cn/ubuntu/ xenial main restricted universe multiverse
deb https://mirrors.tuna.tsinghua.edu.cn/ubuntu/ xenial-updates main restricted universe multiverse
# deb-src https://mirrors.tuna.tsinghua.edu.cn/ubuntu/ xenial-updates main restricted universe multiverse
deb https://mirrors.tuna.tsinghua.edu.cn/ubuntu/ xenial-backports main restricted universe multiverse
# deb-src https://mirrors.tuna.tsinghua.edu.cn/ubuntu/ xenial-backports main restricted universe multiverse
deb https://mirrors.tuna.tsinghua.edu.cn/ubuntu/ xenial-security main restricted universe multiverse
# deb-src https://mirrors.tuna.tsinghua.edu.cn/ubuntu/ xenial-security main restricted universe multiverse

# 预发布软件源,不建议启用
# deb https://mirrors.tuna.tsinghua.edu.cn/ubuntu/ xenial-proposed main restricted universe multiverse
# deb-src https://mirrors.tuna.tsinghua.edu.cn/ubuntu/ xenial-proposed main restricted universe multiverse
bash增强
可参考 Bash定制
必装软件
- sudo apt-get install openssh-server
- sudo apt-get install g++
- sudo apt-get install cmake
- sudo apt-get install gdb
装完gdb之后添加一个pstack脚本方便查看运行时的程序堆栈(用法 : pstack pid) :
sudo vi /usr/bin/pstacksudo chmod +x /usr/bin/pstack
pstack脚本的内容如下 :
1 | #!/bin/sh |
若是ubuntu桌面版的话可以安装一下增强功能
桌面版ubuntu安装增强功能
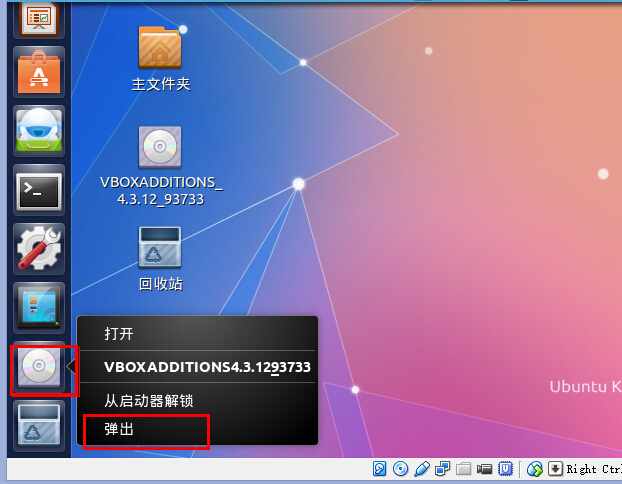
注 : 如果在侧边找到如下图加载的虚拟光驱,就需要先右击,点击弹出,然后才可正常安装增强功能
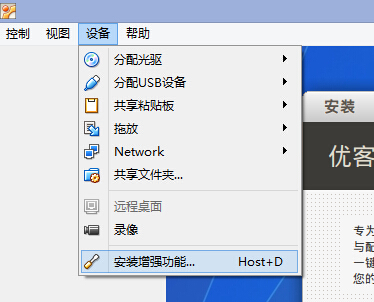
点击安装增强功能
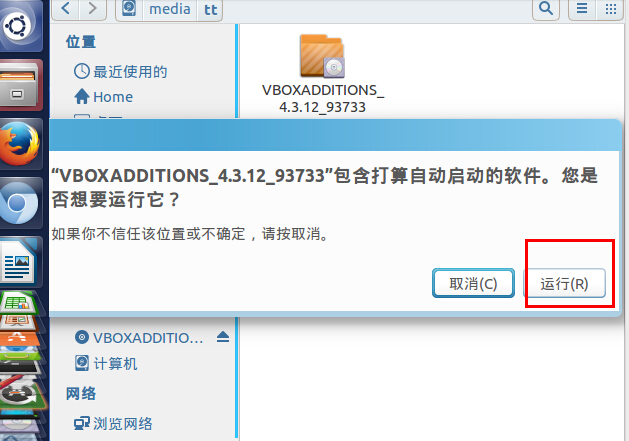
点击“运行”
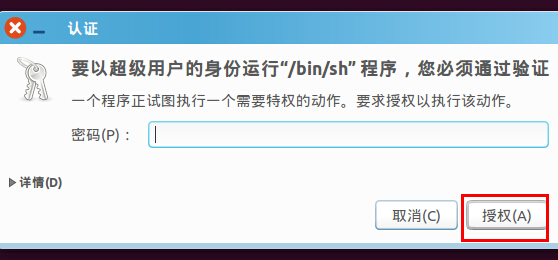
输入登录系统的密码,点击授权,就开始自动安装了
如图,为安装界面,安装完成后按下回车键,就按照成功了。
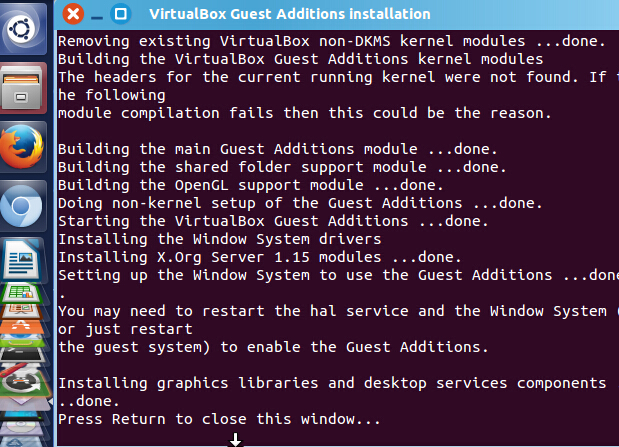
安装好后关闭ubuntu再次启动ubuntu的时候,虚拟机就可以在无缝模式和自动显示尺寸下运行了。